Hi everyone,
I'm going to do a makeup tutorial on how to put eyeliner ( well, inkane wants to learn how to put on eyeliner so here you go.)
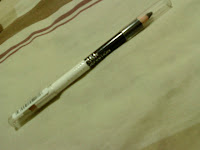
I'm going to use different eyeliner for different eyes. For my left eye I'm using my Maybelline Line 'n Design eyeliner.

this is the one

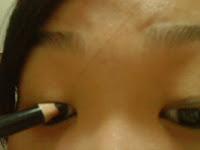
so this is how my bare eyes look without the eyeliner.
For lower lid, the first step is to line starting from the inner rim of your eyes. Like so:


slowly extending your line to the middle of the eye

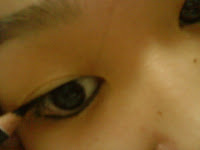
And then the corner

And you should see a difference in my left and right eye. It's now more defined, isn't it?

Next is lining the upper eyelid. I like to start from the outer corner of my upper eyelid, slowly bringing the line towards the centre. Remember to use small, short stroke for easier application.


This is how the end result of my upper eyelid looks like. I'm sorry, I can only show the close eye version :X because for this eye I did not use my double eyelid sticker and my eyes are monolid, so yeah ): sad for me.

Next I'm going to do my right eye. My first step is to paste my double eyelid sticker for a more obvious end result, unlike the left eye one.
This is how it looks like after the sticker is pasted. (;

For my right eye, I use my Rimmel Extreme Definition Two-toned eye definer in 003 Trendsetter
Starting with the outer corner of your lower eyelid, softly press the eyeliner against your eyelid.

Like the first one, slowly extend the liner towards the middle of our eyes. Oh, and remember to sharpen your pencil eyeliner. It is important to ensure accuracy.


Extend your line till where your eye kind of stops. Then, apply the liner on top of the line to ensure that there are no gaps in between.

It should look something like this.

Now, time for the upper eyelid. Start from the inner rim of your eyes and softly rubbing the eyeliner against your eyelid. For easier application, use a Q tip and gently press them against your upper eyelid to reveal more skin. In my case, I can't use them because the other hand is holding my handphone camera :X but for myself, I can manage with just one hand. Remember, do not, Never ever use your finger to tug your upper eyelid. It will cause premature sagging( wrinkles).
Once again, extend to the middle of the eye. Using soft,short stroke for more accurate application.


Towards the outer corner of the eyes, you may want to extend the line out to create wing. But since this tutorial is for a guy( actually girls can use them as well) I'm just showing the most basic way.

Remember to line your tide lines so that the eyeliner cover the whole area around the eyelashes. This also gives a more natural look.

Then, once you're done with that, draw over the line once again to ensure there are no gaps and cracks within the line. Oh, it is also useful to smudge your eyeliner a little using a Qtip as it feathers them out and soften the look a little.


ta-dah! This is how my right eye looks like after the whole thing =P

A picture I took so you can compare the left and the right eye. You can see clearly that my rightt eye look so much bigger than the left one. =\ This is why i prefer using pencil to auto liner now.

This last step is recommended for those who wants a bigger and brighter looking eye. ( mostly girls I reckon) Using the white tip of my eyeliner, I line the waterline of my right eye. This instantly perks the eye and gives the effect of bigger looking eyes.

This is the end result after the whole thing. So..this is why I like my Rimell eyeliner more. (:

Okay, that's that for now. I hope that inKane will learn from this tutorial and if there's anything you do not understand just contact me on...MSN. =P
ttfn guys ^^
goodnight!
rieka
 sugar,spice and all thing nice.